Using A TMP36 Temperature Sensor With Arduino
- Chris @ BCR
- July 7, 2015
- four:10 pm
-
The TMP36 temperature sensor is an piece of cake way to measure temperature using an Arduino! The sensor tin can mensurate a fairly wide range of temperature (-50°C to 125°C), is fairly precise (0.i°C resolution), and is very low price, making information technology a popular choice. In this tutorial nosotros volition go over the basics of hooking the TMP36 upward and writing some basic code to read the analog input it is connected to.
A Few Considerations:
Earlier we leap into getting this TMP36 temperature sensor hooked upwardly at that place are a few points to consider:
• This sensor is non weatherproof, so it will need to be shielded from direct exposure to the elements.
How It Works:
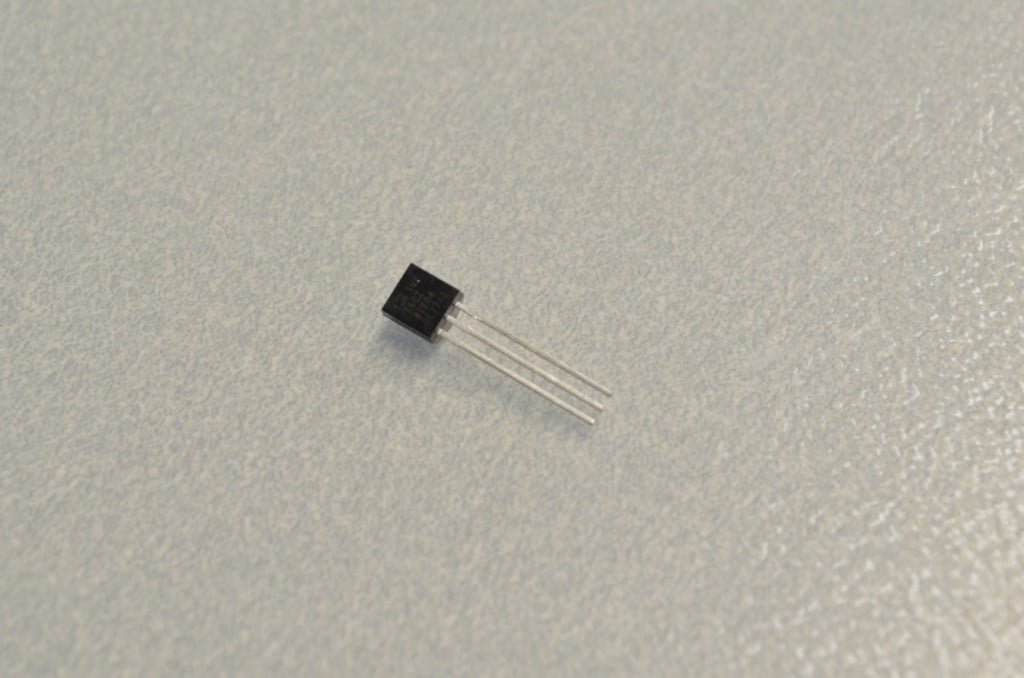
Different a thermistor, the TMP36 does not have a temperature sensitive resistor. Instead this sensor uses the property of diodes; as a diode changes temperature the voltage changes with it at a known charge per unit. The sensor measures the minor alter and outputs an analog voltage between 0 and 1.75VDC based on it. To get the temperature we just need to measure the output voltage and a piddling bit of math!
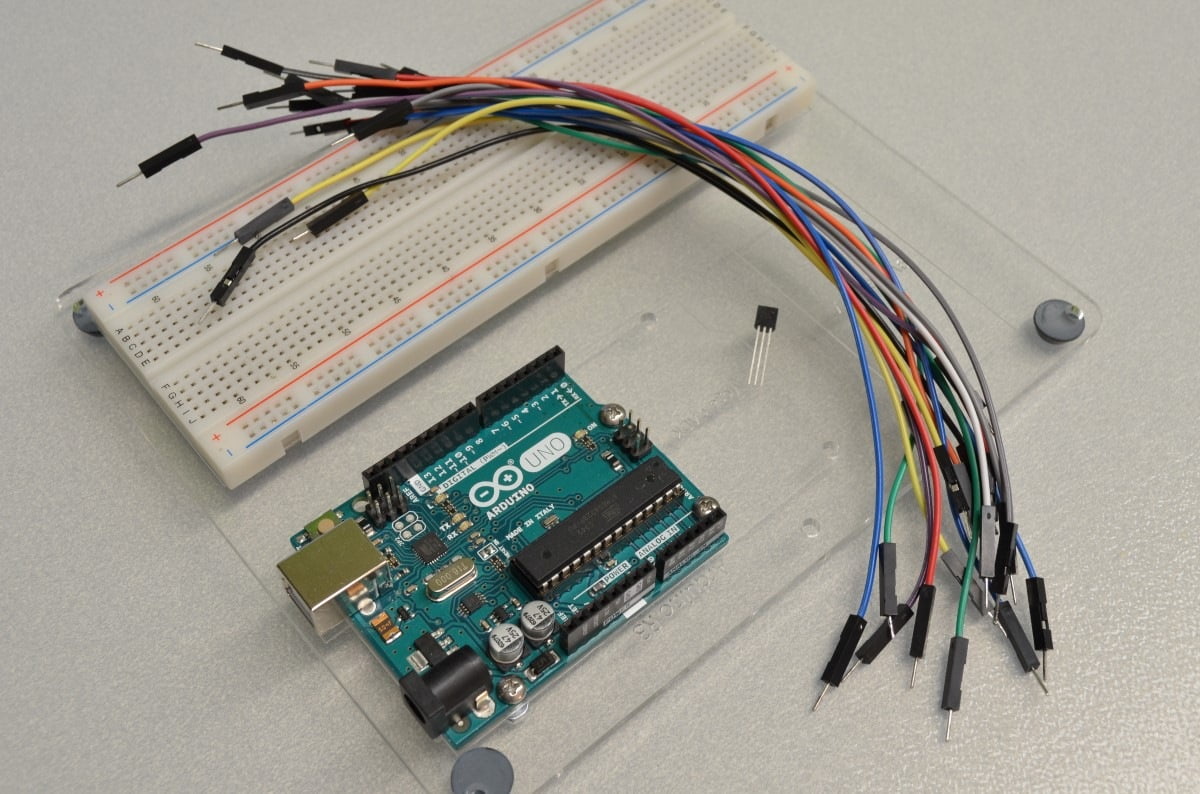
This tutorial will exist requiring a few common parts:
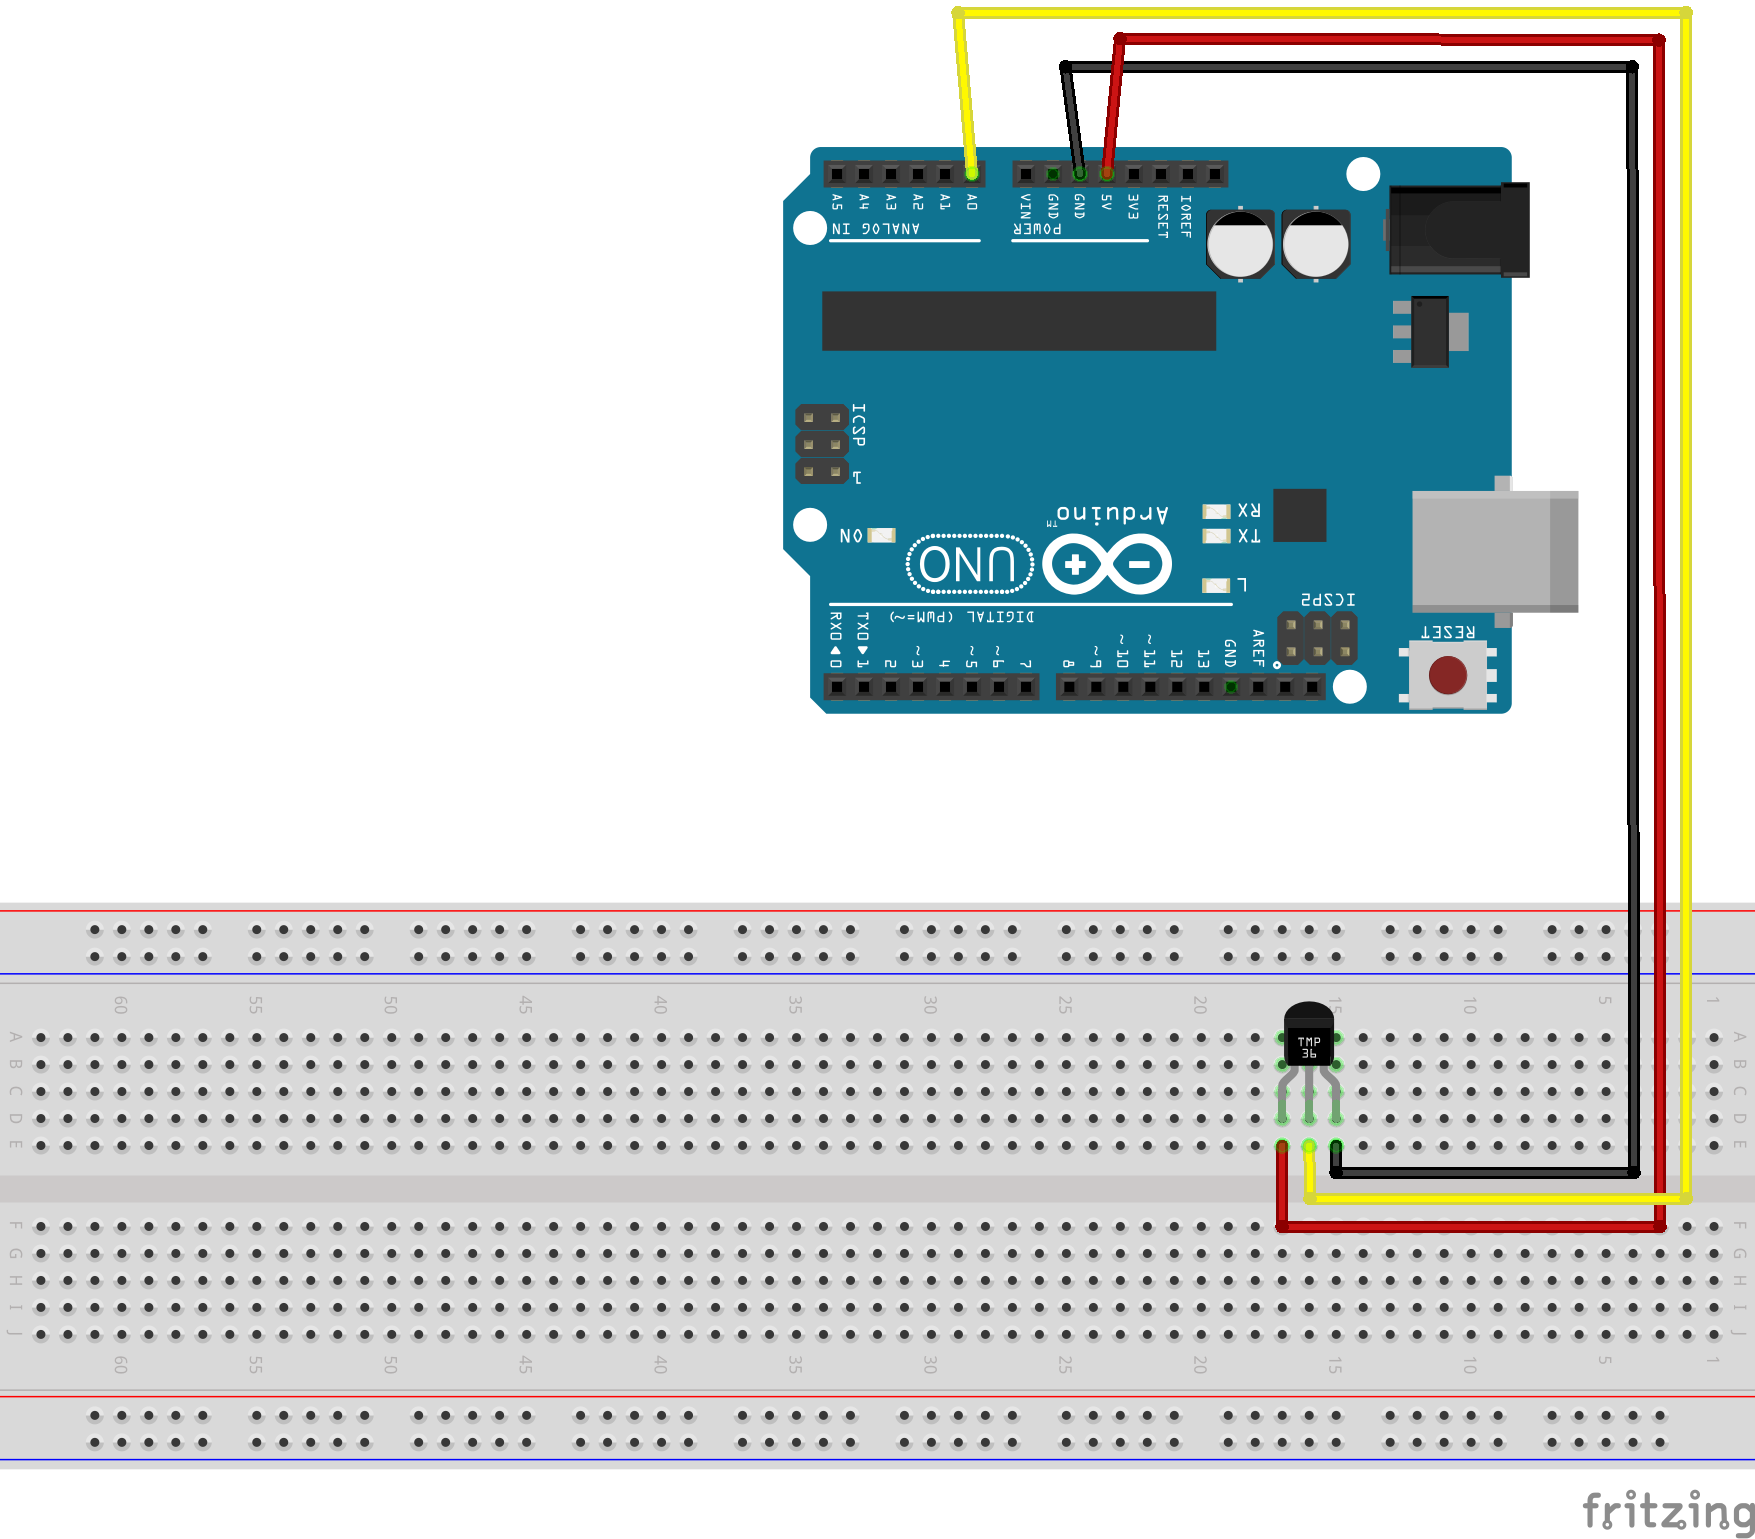
This handy little diagram shows how nosotros volition be connecting everything. Don't worry if it looks a trivial overwhelming, nosotros volition exist going through this stride by footstep!
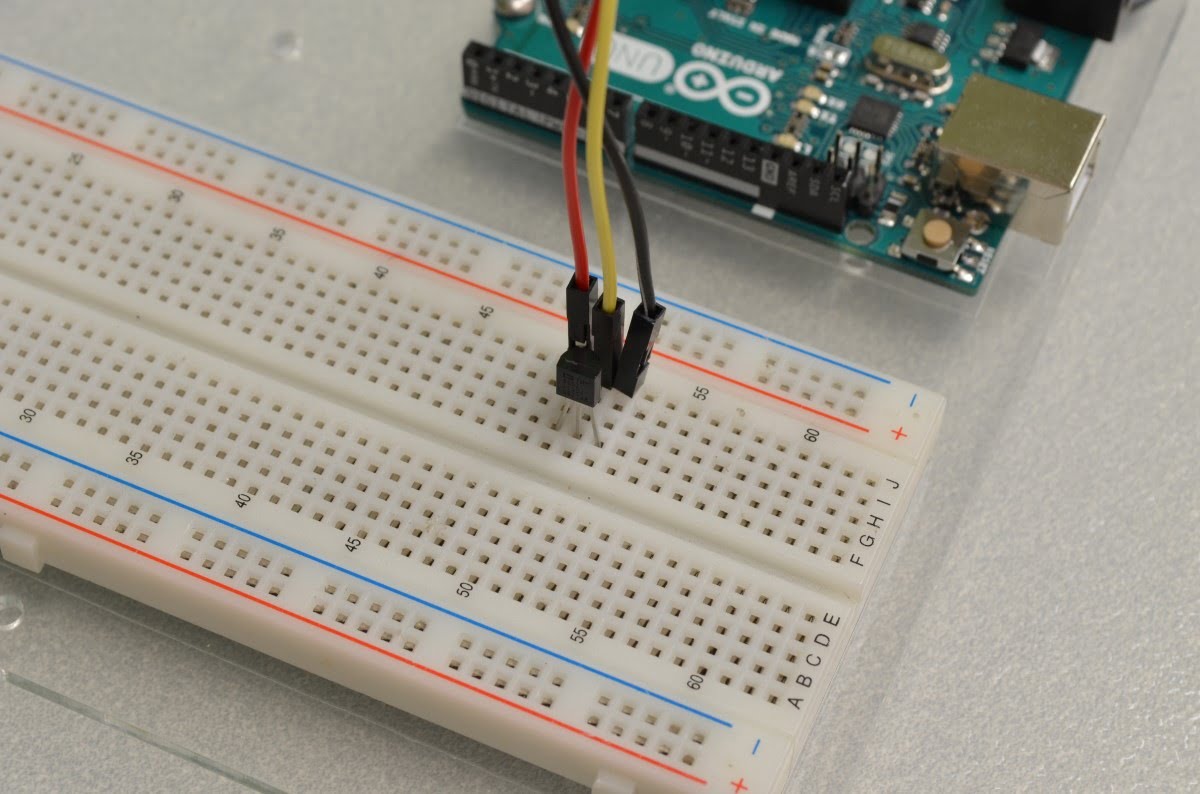
Since this sensor is very simple and does not crave whatever supporting components we will be directly connecting the sensor to the Arduino. First by bending the legs on the TMP36 sensor and so they will fit into the breadboard.
This sensor has a fairly wide input voltage, meaning it isn't terribly picky almost the voltage required (anywhere betwixt 2.7VDC and 5.5VDC). Nosotros will use the Arduino'south 5VDC power for this tutorial. First by connecting a jumper wire from the Arduino's 5VDC pivot and running information technology to the sensor's "pin 1". Adjacent, run some other jumper wire from one of the Arduino's ground pins to the sensor's "pin 3"
We are going to be using ane of the Arduino'south analog input pins for this tutorial. Run a jumper wire from the sensor'south "pin ii" (the middle pivot) to an analog input. Nosotros will be using analog input 0 in this tutorial.
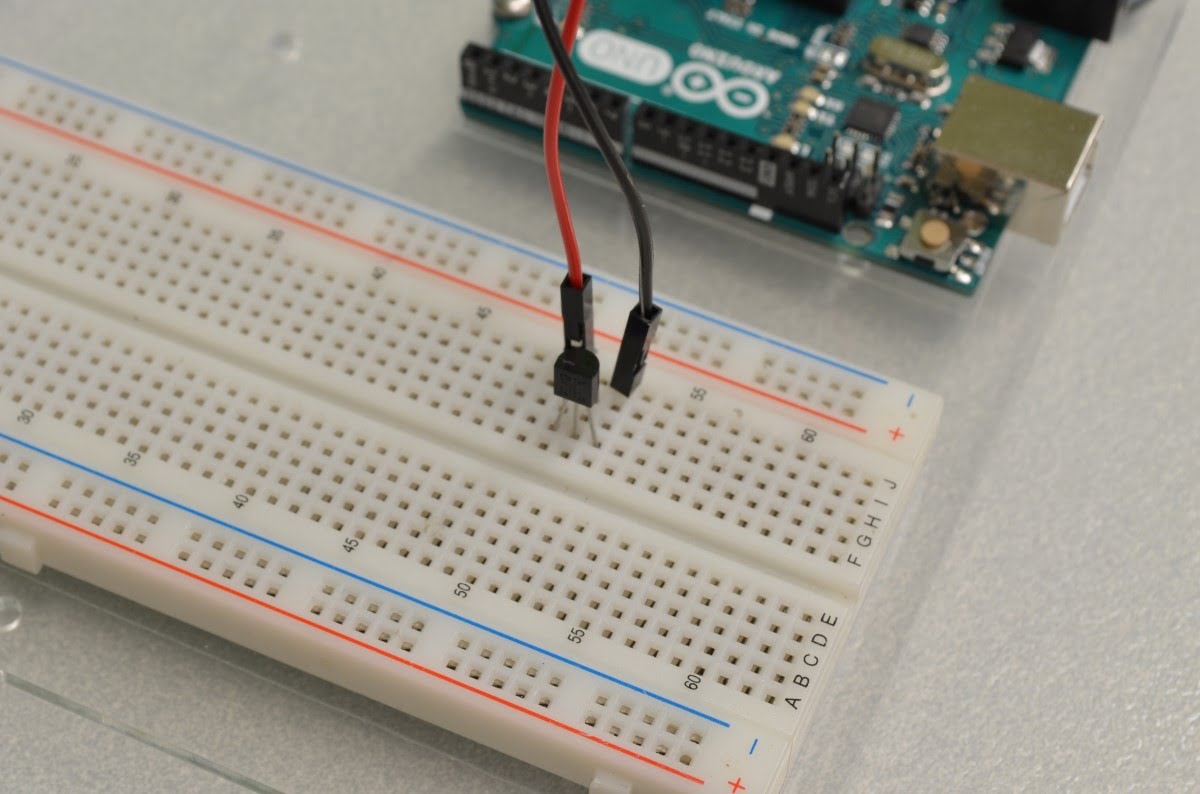
Before nosotros give the Arduino power information technology is always a good thought to become over all of the connections to make sure at that place are no wires in the incorrect spot – sometimes that tin brand for a very expensive mistake!
void setup() { // put your setup lawmaking here, to run one time: } void loop() { // put your main lawmaking here, to run repeatedly: }
Now that we have finished with the hookup we need to kickoff writing some code. Nosotros will be using the Arduino IDE, this is available from https://world wide web.arduino.cc/en/Main/Software
We will commencement with the "BareMinimum" sketch found by clicking "File" and selecting Examples / Basic / BareMinimum. This sketch is a keen starting point every bit information technology includes the Setup and Loop functions – we volition write the rest!
This sensor is very easy to read – the sensor does all of the hard work and so all we have to do is read the output. Since the output voltage is an analog voltage proportional to the temperature we tin can do some very basic math to take the voltage and turn it into a number that makes more sense.
We are starting with the BareMinimum Sketch constitute in the IDE, it should look something similar this:
And so starting time we will need some variables to use:
We plugged the sensor into analog input 0 then we volition declare this as a variable – this will arrive much easier to change in the hereafter if we always decide to change which pivot the sensor is plugged into. Nosotros as well need ii variables for the data; i will store the initial input from the analog input, and the other volition shop the temperature one time nosotros have converted it to decimal degrees.
Arduino analog inputs practise not need to be configured in the Setup loop, so nosotros will just add some code for starting the serial connection we volition use to output the data.
Ok at present nosotros tin can read the sensor, this will exist done in the loop.
Reading analog inputs is very easy with the Arduino – simply that one line of code!
Now we will use a footling math to convert that data to something a little more familiar:
The analog input gives us a value between 0 and 1023, 0 beingness no voltage and 1023 being 5V. To effigy out what this voltage converts to in degrees Celsius we will need to get-go find the percent of 5V on the input. This can exist done by dividing the sensorInput by 1024.
Every bit nosotros know from the datasheet, the sensor will output 0 – 1.75V over a range of 175 degrees (-50° to 125°) so that ways every 0.01V equals one degree. Nosotros volition need to convert the percentage of input to voltage by multiplying past 5V.
Since we are not measuring 0° – 175° we will demand to shift the output value and so that the minimum reading of -50° equals a voltage reading of 0. Nosotros do this past subtracting 0.5 from the output voltage. Our new value at present ranges from -0.5 to one.25 (which looks remarkably like to our temperature range!)
To convert from millivolts to degrees Celsius we volition need to multiply by 100.
Now that we accept degrees, let's output it via series and then it can be seen from the Arduino Serial Monitor.
That's it – we are all washed.
Now that all of the code has been written it can be uploaded to your Arduino! Click "Upload" button in the top left corner of the Arduino IDE and information technology should upload without any issues. Next, click the "Serial Monitor" push button in the acme right corner (it looks similar a magnifying drinking glass). After a few seconds you should start to see a stream of data announced in the window – that is your temperature in degrees Celsius.
sorensonwhoube1981.blogspot.com
Source: https://bc-robotics.com/tutorials/using-a-tmp36-temperature-sensor-with-arduino/


karthik
aurdino due convert voltage to temperature from ad8495 16bit and output 5mv/degree C. can anyone send me the code for this.
Reply
Tas
int sensePin = A0; //This is the Arduino Pin that will control Relay #ane
I don't recall there is a relay on this project 😉
Respond
James Hudson
Thank y'all so very much for your excellent illustrations, the pictures are very clear with no "blurryness" I had no problem whatsoever agreement exactly how to use a TMP36 to work with an Ardunio using your MOST Splendid diagrams. Give thanks you and so very much for all the time you put into this.
Reply
MikeH
I am using a single Arduino board to hook up the temp sensor and a fan powered using a transistor from one of the digital I/Os. Whenever power is supplied to the fan, the temperature sensor sees a jump in temp (leap in voltage). Why is this occurring and how do I set the problem? Thank you!
Respond
Sp.
Looks like the readings are quite arbitrary.. Does anyone have the same issue?
I found online that a resistor (41.7K) should exist connected on the TMP36 analog output pin.
Whatever comments?
Thanks,
Sp.
Reply
Chris @ BCR
Personally – i wouldn't rely on the TMP36 to be anything more than than a rough approximation. It is an easy sensor for people to learn with simply if you are concerned almost what the temperature really is, there are far amend options. I am a fan of using thermistors and thermocouples – all of these IC based temp sensors tend to read warm due to the internal heating of the onboard circuitry.
Reply
Lucas
HI! I'one thousand having issues every time i run the program it comes up with minus temperatures plz assist.
Respond
Chris @ BCR
Likely this is due to the sensor not being connected correctly or not functioning correctly. Your default value if the sensor is unplugged will be -50. Double check the connections and try another sensor if you lot can.
Reply
Anonymous
int sensePin = A0;
int sensorInput;
double temp;
void setup() {
Serial.begin(9600);
}
void loop() {
sensorInput = analogRead(A0);
temp = (double)sensorInput / 1024;
temp = temp * five;
temp = temp – 0.v;
temp = temp * 100;
Serial.print("Current Temperature: ");
Serial.println(temp);
if(temp > 15){
digitalWrite(2, Depression);
}
if(temp < fifteen){
digitalWrite(2, HIGH);
}
}
I'chiliad trying to make a motor turn when information technology is over a certain temperature for a fan but i cant get information technology to work
Reply
Deepak Rajendra Waghmare
tin can we connect the sensor output to the input of digital pin instead analog
Reply
mike87
no… they are analog sensors
Reply
Skelder
I'm working with a TMP with a range of -40 to 125. How do i find a new number to divide by instead of the 1024
Respond
Jessica
1024 stays the same change this line:
temp = temp – 0.v; //Subtract the outset
to
temp = temp – 0.4; //Subtract the offset
Respond
Carl Summers
When I ran it for the first time, I become approximately the correct temperature, but equally I connected using an Uno with the sensor, the TMP36 started reading excessively high temperatures into 100 before the board itself shut off and could not be used for several hours. Would you recommend using something like a capacitor to forestall this from occurring? And if and so, where does the capacitor fit on the circuit?
Answer
Halley Ganado
If for instance the sensor reached a temperature of 50 degrees celcius, can nosotros apply the code made from the sensor to make a motor spin?
Answer
Serega74
Found this slice if lawmaking to work much amend:
tempAve=0;
for(int i = 0; i < 1000; i++){
sensorInput = analogRead(A0); //read the analog sensor and store it
temp = (double)sensorInput / 1024; //notice pct of input reading
temp = temp * five; //multiply by 5V to get voltage
temp = temp – 0.5; //Subtract the offset
temp = temp * 100; //Convert to degrees
tempAve=tempAve+temp;
}
tempAve=tempAve / 1000;
// Print result
Series.impress("Current Temperature: ");
Serial.println(tempAve); //in again
Reply
mike87
yikes that is bad – so if the boilerplate temperature reading exceeds most (+/-)32.7 Celsius your code freezes
Reply
GioWisely
temp variable is repeated, logic will go misfile. I'm not a pro, please comment on this tweaks.
#ascertain buzzer two
int sensePin=A0;
int sensorInput;
double temp;
int tempvoltage;
int temppercent;
int tempcelcius;
void setup() {
Serial.brainstorm(9600);
pinMode (buzzer, OUTPUT);
}
void loop() {
sensorInput=analogRead(A0);
temp=sensorInput/1024;
tempvoltage=temp*5;
temppercent=tempvoltage*0.95;
tempcelcius=temppercent*100;
if (tempcelcius>37.5){
digitalWrite(buzzer, HIGH);
}
else{
digitalWrite(buzzer, LOW);
}
}
Respond
Chris @ BCR
The variable temp is simply being reused. Everything on the right side of the equal sign is done commencement, and so the variable "temp" is fabricated to equal those results and carried to the next operation. Saves declaring a bunch of variables for one time use.
Reply
unknown
how is the value from sensor lies between xx to 358
what are these values?
Respond
a
I don't know if you lot've figured this out by now, only your "if" statement is backwards. I presume y'all want the fan to come on above 15c. It should exist like this:
if(temp > 15){
digitalWrite(2, HIGH);
} else {
digitalWrite(ii, LOW);
}
Answer
Jacker
In all the data sheets for the TMP36 it says -twoscore C to 125 C. And so aye, the subtraction I think should be temp = temp -0.4, instead of as shown here as temp = temp – 0.5.
Merely there is another thing. The data canvas seems to me to be contradictory, but when you look at the charts section it looks like at -xl degrees C the voltage is NOT 0, it is (hard to run into because it is not enough resolution just approx.) 150mV. At -40 C.
So don't nosotros have to adapt for that besides, as 150mV is the base voltage…lowest.
.?
Reply
Chris @ BCR
We aren't subtracting the negative portion of the temperature range here, nosotros are subtracting the offset between the calibrated voltage vs the calibrated temperature.
– Nosotros know it is 10mV / degree and the sensor has a max reading of 1.75V
– We also know that it is corrected to 750mV (0.75V) = 25 degrees Celsius (per the datasheet) 0.01 * 25 = 0.25 , 0.75 – 0.25 = 0.5
So the offset is 0.5V (or 50 degrees) so you would accept your voltage reading and subtract 0.5V to align it to the calibrated point of 0.75V = 25 degrees Celsius.
Respond
Chris @ BCR
No worries! The TMP36 is an old sensor – very sometime past electronics standards so there accept been several iterations and unlike manufacturers, then things have changed over the years. Early on when the tutorial for the TMP36 was written, we had a -50 to 125C TMP36 , which worked (though it never seemed to exist able to reach 0V/-50 due to its internal heating). Fortunately, in each version of the chip since, they never deviated from the 0.75V = 25C, and the equation has always stayed the aforementioned (though I approximate we should go back and update the logic a fleck)
A note almost measuring temperature: As yous approach the limits on each end of the range you as well tend to accomplish the maximums of the +/- accuracy and self heating bias – which can be upwardly to +/-5 degrees with this sensor so any slight variation on their graphs could be a reflection of that as well. In that location isn't a temperature sensor out there in this price range that isn't going to demand a significant level of calibration if you want to get that accuracy across the entire range – and so take the information they give yous in the datasheets and the readings from any temperature sensor with a grain of salt. This method we use is actually just a quick and muddy fashion of grabbing the temperature – whatever reasonable need for accuracy should look at a dissimilar sensor or a much more than circuitous, calibrated, method of correcting the input.
Regarding the iii.3V aspect: right, but besides also double check it has the same bit-depth ADC as the Uno. If it is not 10 bit (0-1023), you volition have to change "1024" to match the fleck depth of any the lath yous are using.
Hopefully that helps!
Reply